Introduction
What initially felt like a complex, dependency-heavy process is now surprisingly simple. With the latest models, applications like LM Studio and OpenCode, the barrier to running capable, tool-using models locally has dropped significantly, making it possible with consumer-grade personal computing components to host, and prompt local models to perform work and execute tools.
Setting up a LLM at home may seem like a daunting task. I was initially reluctant to set them up myself given all of the python dependencies I thought that I would have to examine and thoroughly understand before I could even begin to see any real progress. In actuality, I was just misinformed. There have been, and continue to be many open source solutions that are extremely well maintained to facilitate running LLMs on your own personal computer.
With access to several graphics cards totaling 16gb of RAM, 64gb of DDR5 memory, and a strong CPU, I knew that I must have the hardware necessary to unlock at least some large language model usage potential, and I was determined to make them work.
My immediate goal was to be able to utilize models to write and execute code. What I discovered after downloading a few popular hugging face models is that not every model is built this way. You have to find models that have “tool” support, which means that they were trained to execute tools (like bash) and to react to their output.
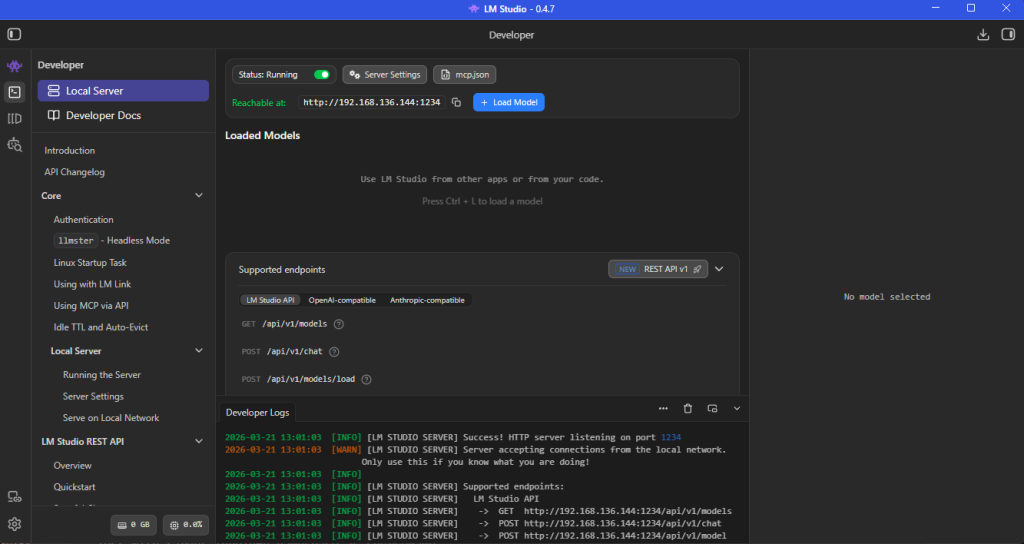
The model-hosting application that I found to support my needs and enable configuration of the running model’s properties is LM Studio. This well-maintained application enables you to host and run models on a local server.
This also means that you need an interpreter for those tools. I found OpenCode to be a well maintained and suitable application for interfacing with the models tools that was extensible with wide support for integrations to IDEs and the command line.
With these applications installed, I was now ready to choose a model. I found it easier to install and host the GPT-generated unified format (.gguf) files because they are built with varying levels of quantization. Quantized models essentially approximate results and have lower precision when processing requests. Because of this tradeoff of precision, there are lower VRAM requirements for higher-end models that are built with more parameters. The parameters are how much information the model can store and represent and how much information it can read at once.
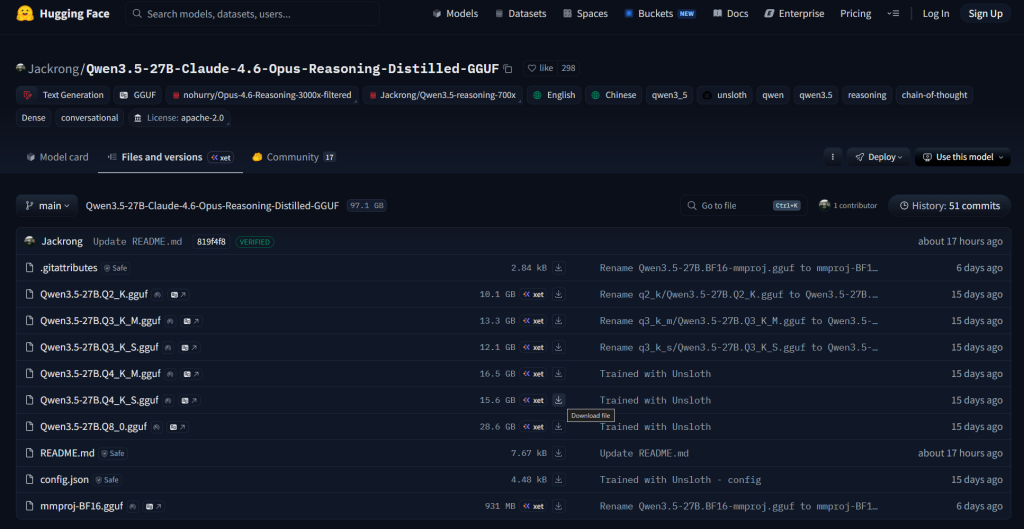
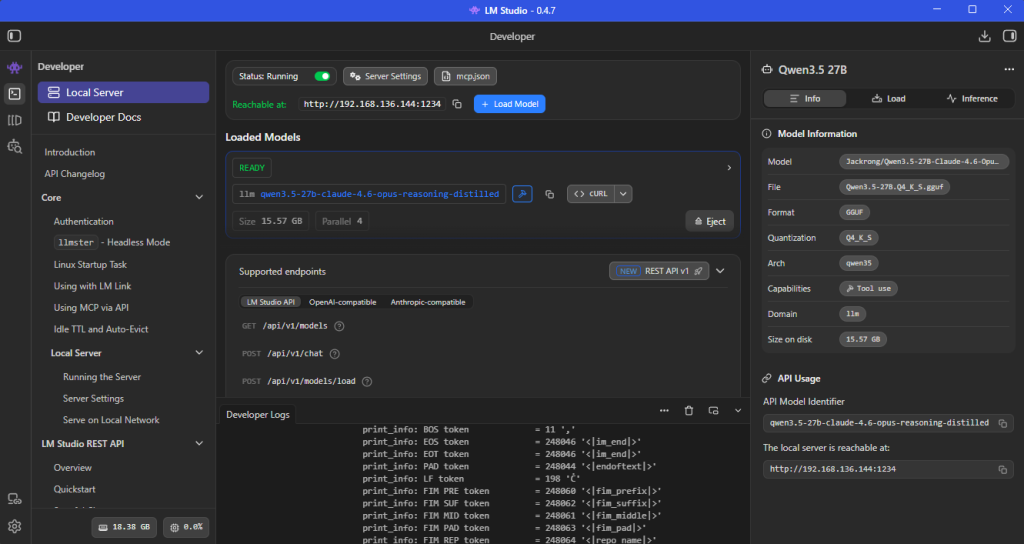
My research led me to the Qwen models. These models support tool execution, and have great ratings. Qwen3.5 is the latest version of their models that I have been working with. After some investigating, I found a fine-tuned, quantized model: Qwen3.5:27B Claude 4.6 Opus Reasoning Distilled GGUF. This model in particular had various levels of quantization and the Qwen3.5-27B.Q4_K_S.gguf in particular required less than the 16gb of VRAM that I have. You can gauge this fairly easily based on the physical size of the file (15.6gb). It is important to leave some space for the KV cache on your VRAM. You can also validate this by loading the model through LM Studio and checking your system’s allocated VRAM by the model.
Now comes the setup: installing LM Studio, installing OpenCode, starting the server, loading the model, configuring OpenCode to support the provider (LM Studio) and its model, and finally prompting.
Setup Guide
Step 1: Install LM Studio
Download and install LM Studio for your operating system. The installer is straightforward and requires no special configuration.
Once installed:
- Launch the application
- Navigate to the Models tab
- Sign in (optional, but helpful for browsing models)
Step 2: Download a Quantized Model
From Huggingface:
- Search for your model (e.g., Qwen3.5 27B variants)
- Select a GGUF version with an appropriate quantization level (e.g., Q4_K_S)
- Download the model directly inside the app
Keep in mind:
- File size ≈ VRAM requirement (with some overhead)
- Leave headroom for KV cache (typically 10–20%)
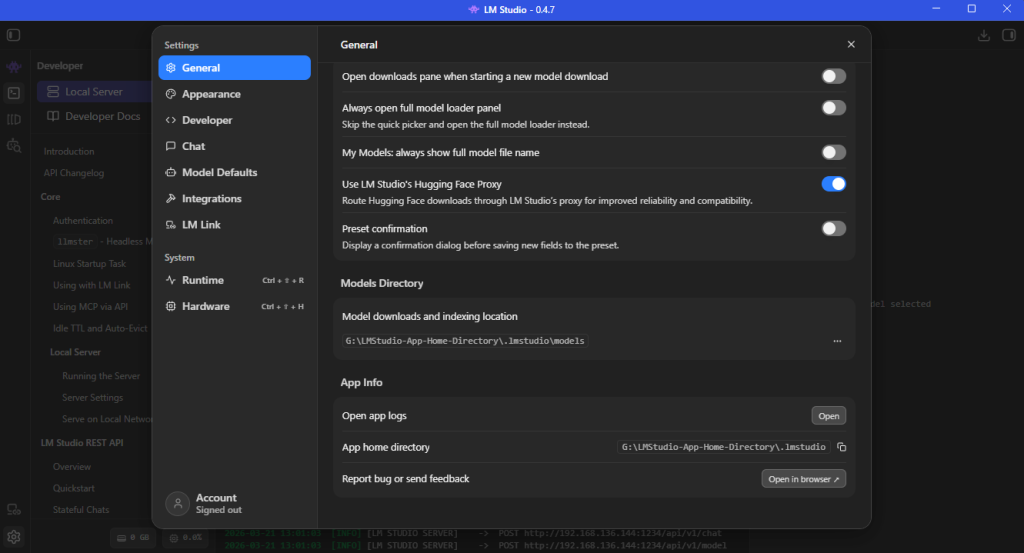
Step 3: Load the Model into Memory
After downloading:
- Go to the Gear Icon and General tab
- Identify your Models Directory location
- Move the downloaded model’s .gguf file to the Models Directory
- Navigate to the Developer page’s Local Server tab.
- Select your model from the dropdown
- Click Load Model and choose your model
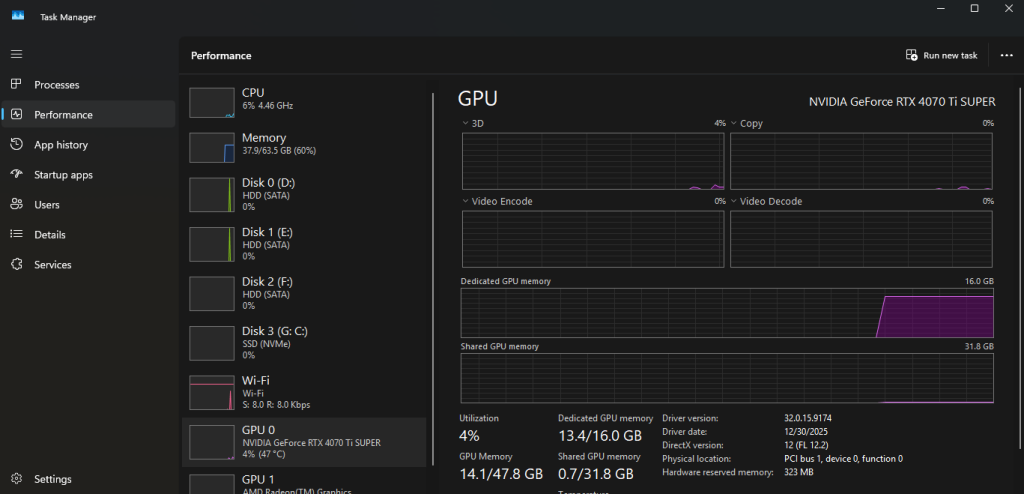
Watch your system metrics:
- GPU utilization
- VRAM allocation
- Load time (this can take a minute depending on disk speed)
If the model loads successfully without maxing out VRAM, you’re in a good state.
Toggle the Status: switch on the Local Server tab to start hosting the model. You can choose to serve on the local network via the Server Settings button next to the toggle-switch, like displayed in my example image. The default server location is: http://localhost:1234/.
Step 4: Install and Configure OpenCode
Download and Install OpenCode via your preferred method (desktop app or CLI).
Then configure it to use LM Studio as a provider from the configuration file installed at: C:\Users\<username>\.config\opencode\opencode.json.
A minimal configuration typically looks like:
{
 "provider": {
   "LM Studio": {
     "npm": "@ai-sdk/openai-compatible",
     "models": {
       "qwen-local": {
         "model": "qwen3.5-27b",
         "baseURL": "http://localhost:1234/v1"
       }
     }
   }
 }
}Key points:
- baseURL must match your LM Studio server endpoint
- Model name should match what LM Studio exposes
- Provider uses an OpenAI-compatible interface
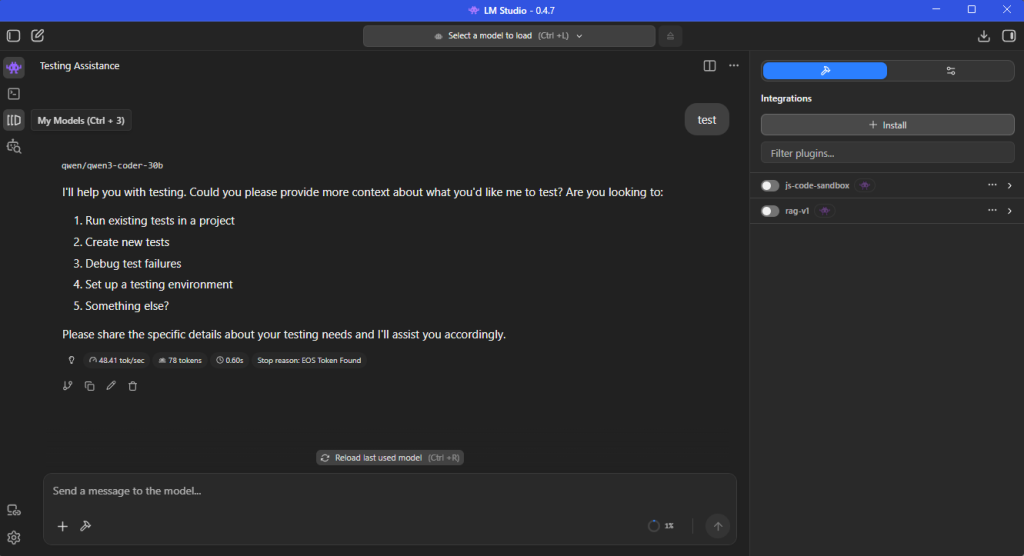
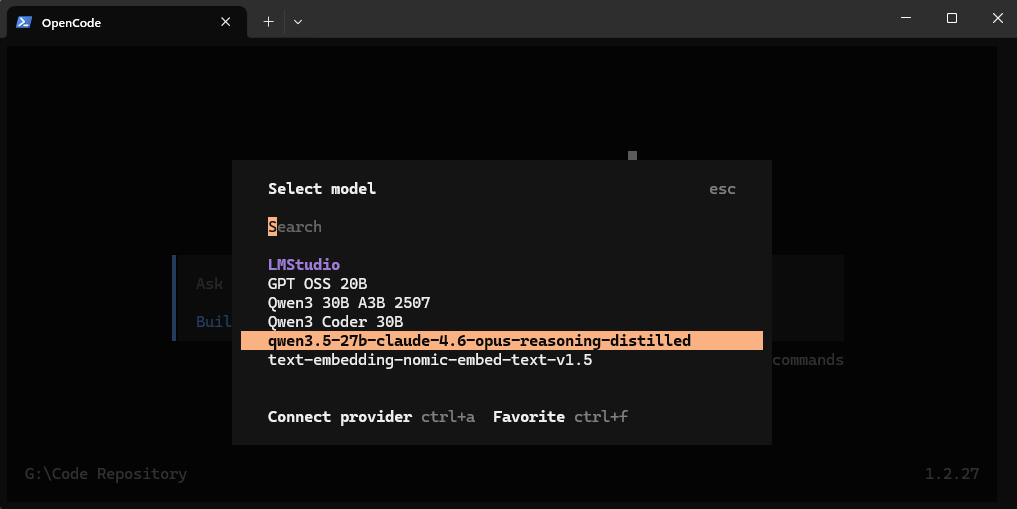
Step 5: Start OpenCode and choose the model
Start opencode with the opencode command via the commandline, (make sure to restart the command line after installing opencode so the Path variable is updated) or the desktop application executable.
Enter the /models command and to bring up a list of models and choose your configured model.
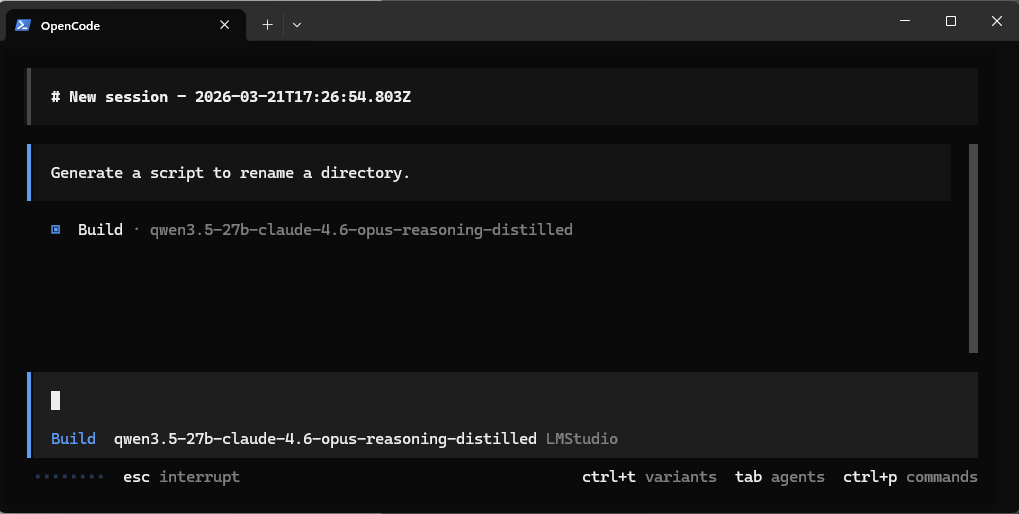
Step 6: First Real Prompt
Now you’re ready to actually use the system.
Start simple:
- Generate a script
- Refactor a function
- Ask for a multi-step coding task
Then move toward more advanced workflows:
- File system manipulation
- Multi-file project scaffolding
- Iterative debugging with tool feedback